- Log on as administrator.
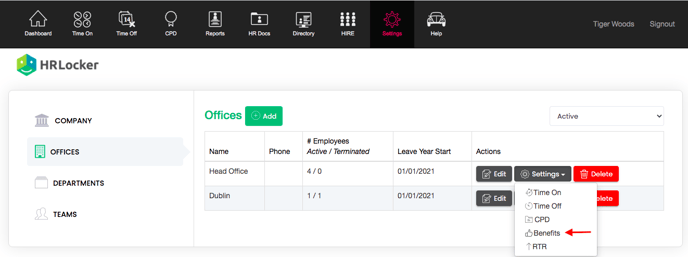
- Select Settings from the black ribbon.
- Select Offices from the green ribbon.
- Select the Benefits button for the relevant office.
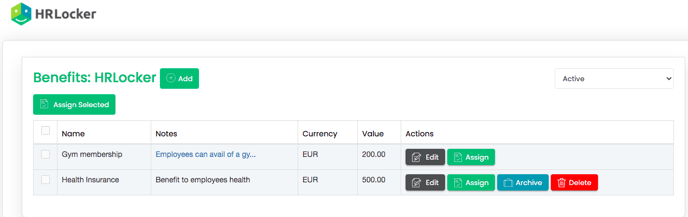
- In our example office, Head Office, you can see 1 existing Benefit.
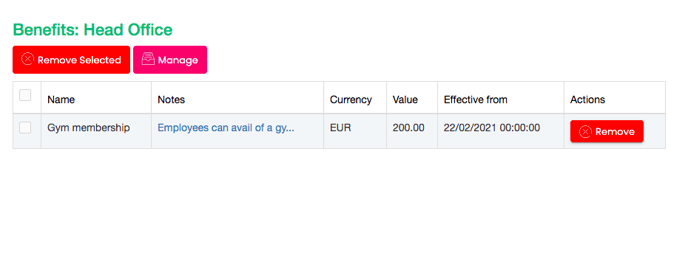
6. Select the Manage Button to access the detail of the existing Benefit.
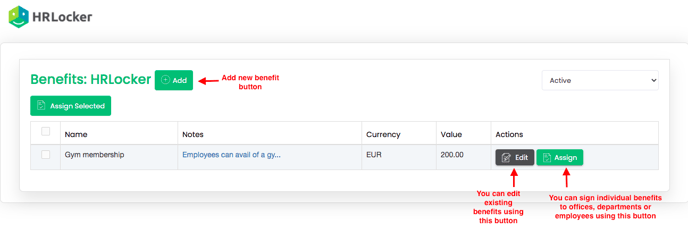
7. Select the ADD button to create a new Benefit.
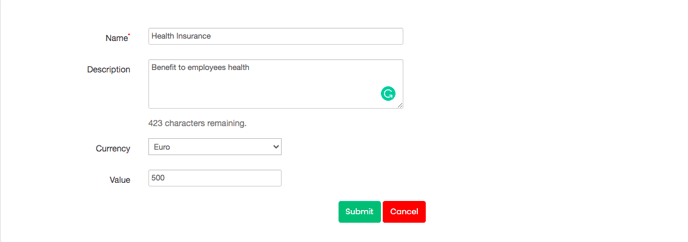
8. Add details of sample second benefit (health insurance).
9. Note the second benefit listed now.
10. Select “Assign” to assign new health Benefit to employees in head office.
11. With offices still highlighted in first drop down box, pick Cork in second drop down box.
12. Change the date to when the benefit came into effect.
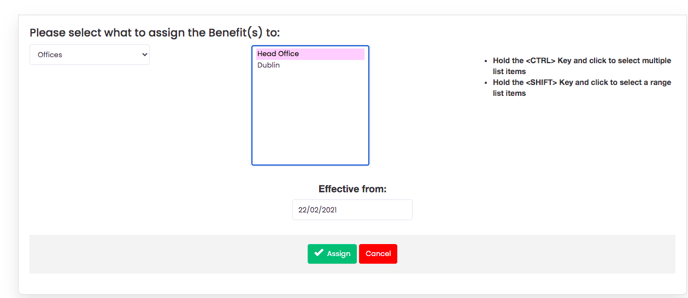
13. Select Assign.
14. Note the benefit is listed for all Head office Employees.
15. Joe Wicks works in the head office but is not entitled to his benefit (still on probation).
So I can see it listed for him automatically but can delete it directly from his account.
16. Select the Directory from the black ribbon.
17. Select View for Joe
18. Select Comps&Bens from the left hand side ribbon.
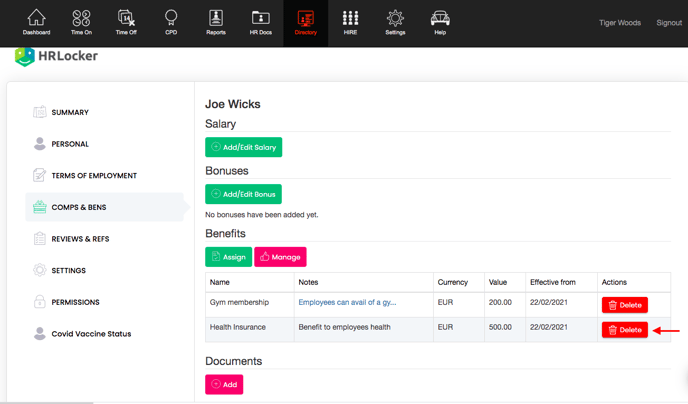
19. Select delete for the benefit (health insurance, gym membership).
20. Confirm you wish to REMOVE this benefit in the dialog box that opens.
21. Note the benefit is removed for Joe in the Comps&Bens tab on the left-hand side ribbon.
22. The benefit is still listed for other head offices employees.
Second example: Assign a benefit to employees individually as well.
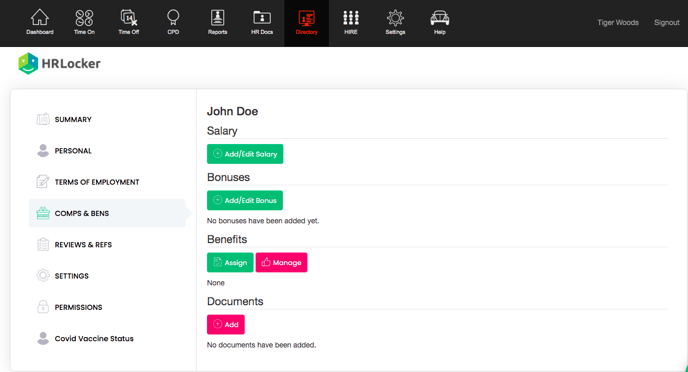
1.We are going to use John Doe for this example, he works in Dublin office.
(He is the only employee at this time in Dublin office)
2. Select the Directory from the back ribbon.
3. View for John Doe
4. Select Comps & Bens tab on green ribbon for John, he has no benefits assigned.
5. Select Settings from the black ribbon.
6. Select Offices from the green ribbon.
7. Select the Benefits button for the relevant office. (Dublin office this time)
8. Dublin office has no existing benefits yet.
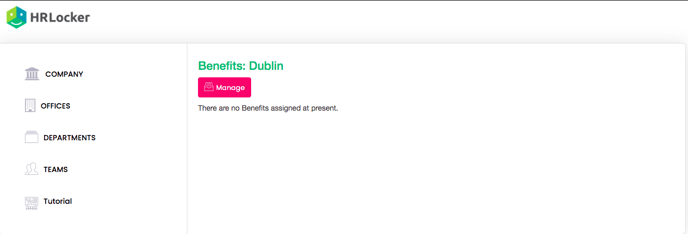
9. Select Manage.
10. You can see the 2 benefits that exist in the company.
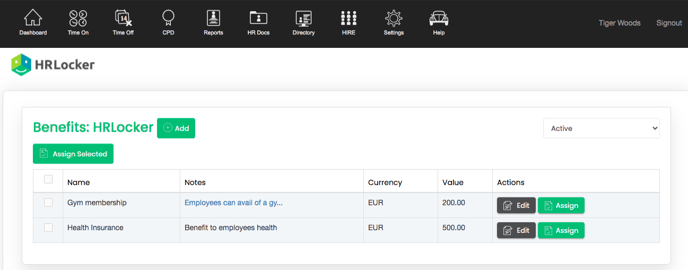
11. Select the Gym membership option on the left tick box, and click Assign.
12. Select employee from first drop down box and John from second drop down box.
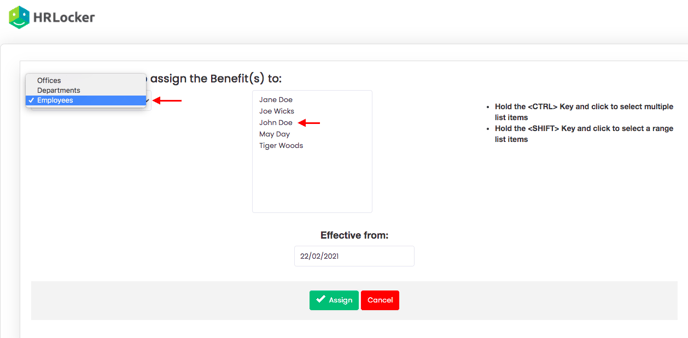
13. Click Assign.
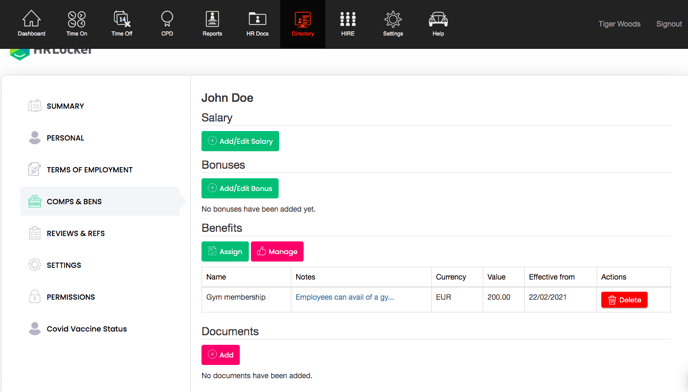
14 Confirm the Gym membership is assigned to John (using steps 2 to 4)
HRLocker allows administrators to manage and assign employee benefits across different offices. This guide explains how to create and assign benefits, as well as how to handle individual employee exceptions.
Steps to Manage and Assign Benefits to an Office
-
Log in to HRLocker as an Administrator.
-
Navigate to Settings:
- Go to Settings<Offices

-
Manage Benefits:
- Select the Benefits to view or manage the benefits for the selected office.
-
View Existing Benefits:
- To view, edit or add a benefit, click Manage.
-
Add a New Benefit:

-
- Click the Add New button to create a new benefit.
- Enter the required details, such as benefit name (e.g., health insurance) and other relevant information.
- Click Submit to save the benefit.
-
Assign Benefits to Employees:
- To assign the new or existing benefit to employees in the selected office, click Assign.
- Select the effective date for the benefit.
- Choose the office, department or individual employee from the dropdown and assign the benefit.
- Click Submit to complete the assignment.
-
Handling Employee Exceptions:
- If certain employees are not eligible for a benefit (e.g., due to probationary periods), you can remove the benefit directly from their individual profile:
- Go to the Directory.
- Select the employee’s profile.
- Navigate to the Comps & Bens tab.
- Find the relevant benefit and select Delete.
- Confirm the removal in the dialog box.
- If certain employees are not eligible for a benefit (e.g., due to probationary periods), you can remove the benefit directly from their individual profile:
Steps to Assign Benefits to Individual Employees
-
Navigate to the Directory:
- Log in to HRLocker and go to the Directory.
-
Select the Employee:
- Find and click on the employee’s profile from the list.
-
Access Compensation and Benefits:
- Navigate to the employee’s Comps & Bens tab to view any current benefits assigned to them.
-
Assign a New Benefit:
- Click on Assign to view a list of available benefits for the employee.
- If the benefit is not listed, click Manage to go to the Manage Benefits section, where you can create new benefits or manage existing ones.
-
Complete the Assignment:
- After selecting the benefit, click Assign to finalize the process.
- Confirm the benefit has been successfully assigned by returning to the employee's Comps & Bens tab, where the newly assigned benefit will be listed.
Key Points for Benefit Management
-
Assigning Benefits by Office: You can assign benefits to all employees within an office by managing benefits at the office level. This ensures consistent application of benefits across the company.
-
Individual Assignments: In cases where only specific employees are entitled to a benefit, you can assign benefits directly to those employees individually.
-
Handling Exemptions: If an employee is not eligible for a particular benefit (e.g., due to probation or job role), you can easily remove the benefit from their individual profile while keeping it active for others.
By following these instructions, you can efficiently manage and assign employee benefits in HRLocker, ensuring that all eligible employees have access to the appropriate compensation packages.