
The Pay Transparency module gives your organisation one place to define how roles are grouped, what each level of work pays and why. Pay transparency rules, including the EU Pay Transparency Directive, ask employers to show that people doing work of equal value are paid on the same basis.
The Pay Transparency module gives your organisation one place to define how roles are grouped, what each level of work pays, and why. It has three parts that work together:
-
Categories group job roles that involve work of equal value, so they can be compared fairly.
-
Pay Grades define salary bands, along with the bonus and benefits at each level.
-
Job Roles describe each role and link it to a pay grade and a category.
You will find all three under Settings. Open Settings from the left-hand menu, then scroll to the Pay Transparency section. Each part has its own link: View and edit Company Categories, View and edit Company Pay Grades and View and edit Company Job Roles.
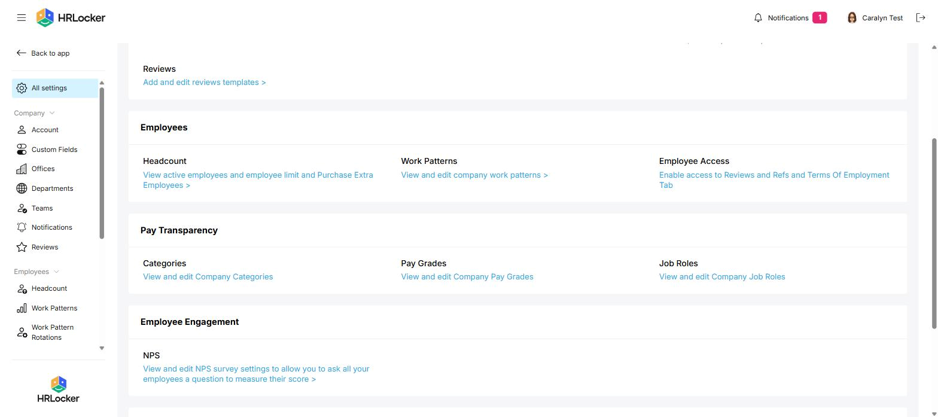
The Pay Transparency section on the Settings page.
Set things up in this order: create Categories, then Pay Grades, then Job Roles, then switch the module on for your offices and finally assign roles to employees. A job role links to both a category and a pay grade, so having those in place first means you can complete each role in one pass.
Switching it on for your offices
Pay Transparency is enabled per office. Until an office is switched on, the Pay Transparency tab stays hidden for everyone in that office.
- Go to Settings and select Offices, then open the office you want to enable.
- Scroll down and tick Enable Pay Transparency.
- Select Submit.
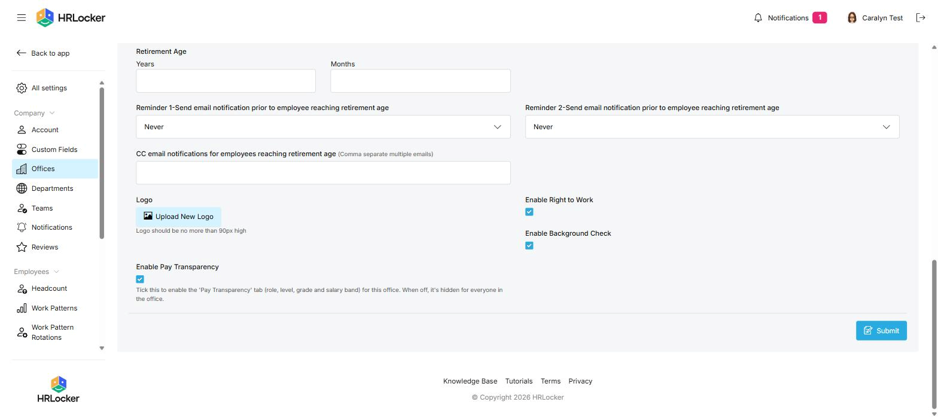
The Enable Pay Transparency setting in an office's settings.
-
Repeat this for each office where you want the module available. Once enabled, the Pay Transparency tab appears on employee profiles in the Directory for that office.
Setting up Categories
A category is a group of roles that involve work of equal value, even where the day-to-day work looks quite different.
To add a category
- Go to Settings, scroll to Pay Transparency, and select View and edit Company Categories.
- Select Add Category.
- Enter a Code (a short reference such as ENG) and a Name. Both are required.
- Add a Description explaining what kinds of work the category covers. This is optional but well worth doing, as it records your reasoning.
- Select Add Category to save. The new category appears in the list, with a count of the roles assigned to it.
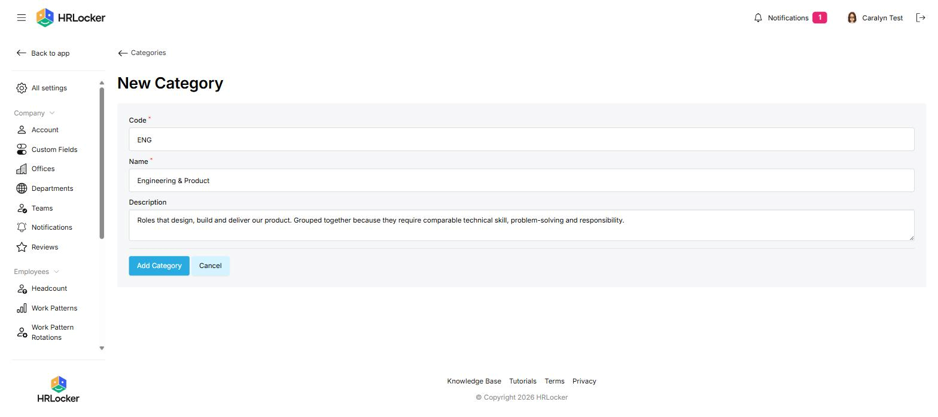
Adding a category: a short code, a name and a description of the work it covers.
Setting up Pay Grades
A pay grade defines a level of responsibility and the salary band that goes with it. Each grade has a minimum and maximum salary in a currency you choose, plus space to describe the bonus and benefits at that level.
To add or edit a pay grade
- Go to Settings, scroll to Pay Transparency, and select View and edit Company Pay Grades.
- Select Add Pay Grade, or use the pencil icon to edit an existing grade.
- Give the grade a Name and a Description of the level of responsibility it represents.
- Choose a Currency and enter the Minimum Salary and Maximum Salary. All three are required.
- Describe the Bonus Entitlement and Benefits Entitlement for the grade, if any.
- Select Save.
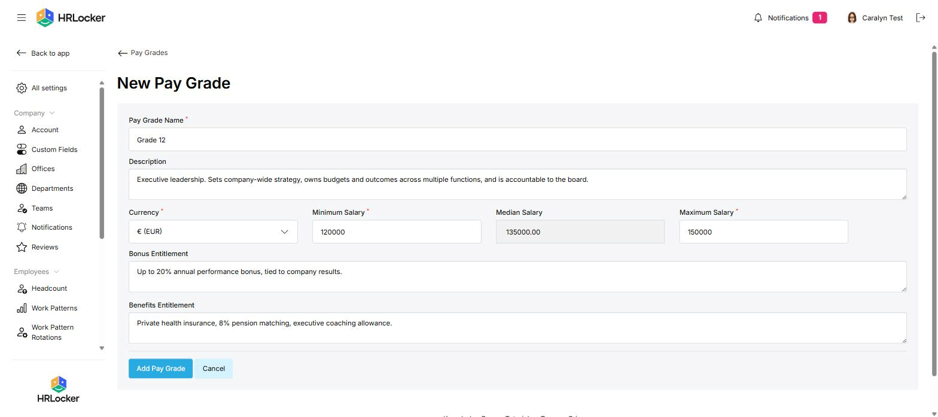
Adding a pay grade. The Median Salary field fills in automatically.
You do not need to enter the median salary. HRLocker calculates the Median Salary field for you from the minimum and maximum.
Setting up Job Roles
A job role describes a position in your organisation and ties everything together: it links to a pay grade for its salary band and to a category for equal-value comparison.
To add or edit a job role
- Go to Settings, scroll to Pay Transparency and select View and edit Company Job Roles.
- Select Add Job Role, or use the pencil icon to edit an existing role.
- Enter the Job Role Name (required) and a Description of the core responsibilities.
- Select the Pay Grade for the role and, if you use them, a numeric Job Level.
- Record the Qualification Requirement: the experience or credentials the role needs.
- Assign the role to a Category, and complete the Category Justification to explain why the role belongs there.
- Select Save.
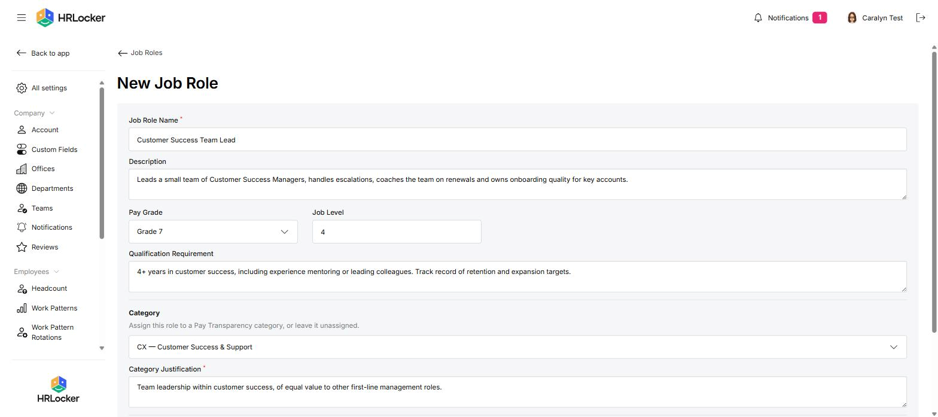
Adding a job role: description, pay grade, level, qualifications and category in one form.
Important: Whenever you change a role's category, HRLocker prompts you to add a short note explaining the change. The note is appended to the Category Justification field, which builds an audit trail of your equal-value decisions over time. We recommend adding it rather than choosing Not now.
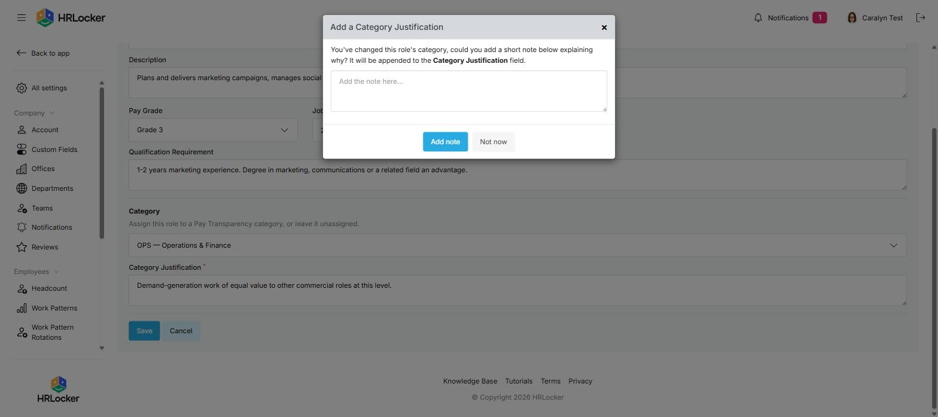
The category justification prompt keeps a record of why roles move between categories.
Assigning roles to your employees
Once your roles are set up, link each employee to theirs. This is what fills in their Pay Transparency tab.
- Open the employee's profile in the Directory and go to the Pay Transparency tab.
- Under Job Role, select the here link. This opens the employee's Job Title section.
- Select the employee's Job Role from the dropdown. Their pay grade, job level, category and salary band fill in automatically from the role.
- Set the Effective From date for the change. Each job title change needs its own effective date, so HRLocker keeps a full history of the employee's roles over time.
- Select Submit.
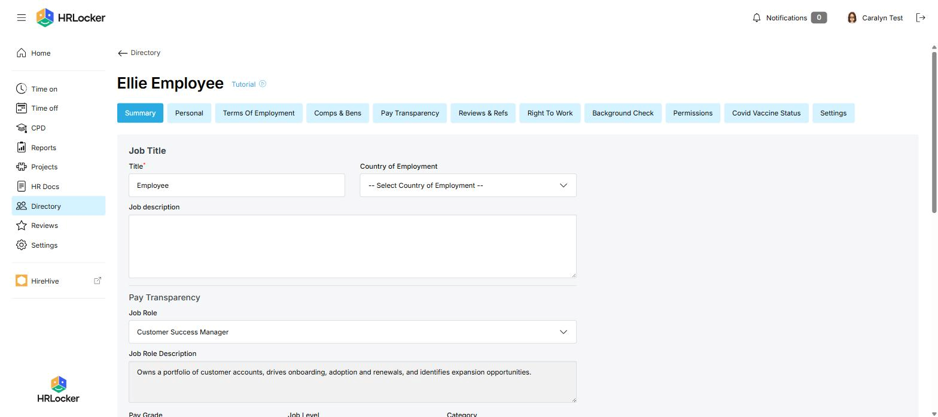
Selecting a job role in the employee's Job Title section. The role's details fill in automatically.
The role appears on the employee's Pay Transparency tab from the effective date onwards. If you want it visible immediately, use today's date. A role dated in the future will not show on the tab until that date arrives.
Back on the employee's Pay Transparency tab, you will now see their role, category, level, pay grade, salary band and role description, all drawn from the framework you set up.
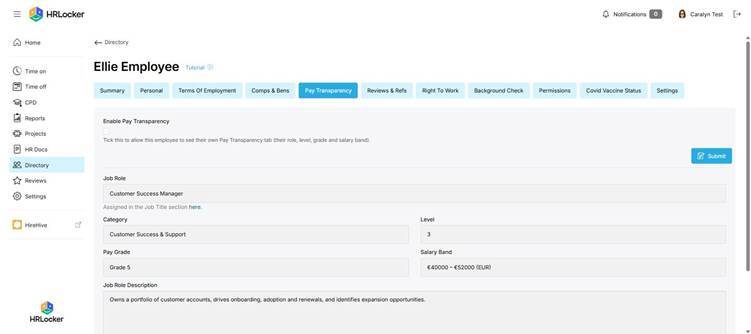
A completed Pay Transparency tab: role, category, level, grade and salary band in one view
Who can see what
Visibility is deliberately conservative: enabling an office does not show anyone their pay details automatically.
- HRLocker admins can see the Pay Transparency tab on employee profiles in the Directory once the office is enabled. The Primary Admin can hide Pay Transparency for other admins.
- Employees cannot see their own Pay Transparency information by default. To switch it on for an individual, open their profile in the Directory, go to the Pay Transparency tab, tick Enable Pay Transparency and select Submit. They can then see their own role, level, grade and salary band.
- Managers with Directory access do not see the tab by default either. In their Permissions tab, under the Directory permission, Hide Pay Transparency is ticked by default. Untick it to give a manager visibility for the employees they can access.
- View (the eye icon) opens a read-only summary of the entry.
- Edit (the pencil icon) opens the entry for changes.
- Archive (the box icon) retires the entry without deleting it.
- The filter in the top-right corner switches the list between Active, Archived and All entries.
- On the Job Roles page you can also filter by category or by pay grade, and search by name, which is handy once your role list grows.
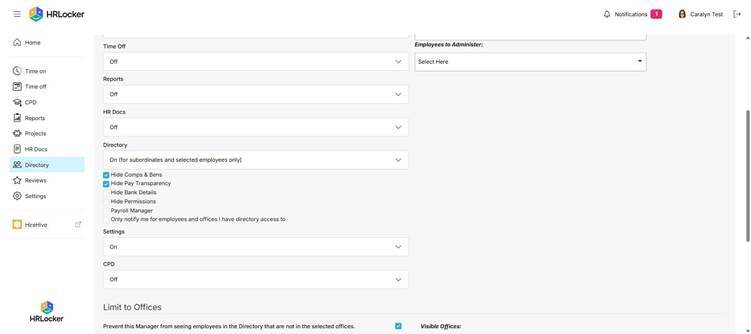
A manager's Directory permissions. Hide Pay Transparency is ticked by default.
That is the full setup. Once your categories, pay grades and job roles are in place and assigned, your organisation has a clear, documented pay framework ready for pay transparency reporting and for answering the questions your employees are increasingly entitled to ask.