Please be aware that guest accounts are not supported in this integration. Only Domains that match the domain configured in the integration settings will be synchronised. If a user is created in 365 with a personal email address, they will be automatically added to HRLocker if their email address is updated to match a defined domain.
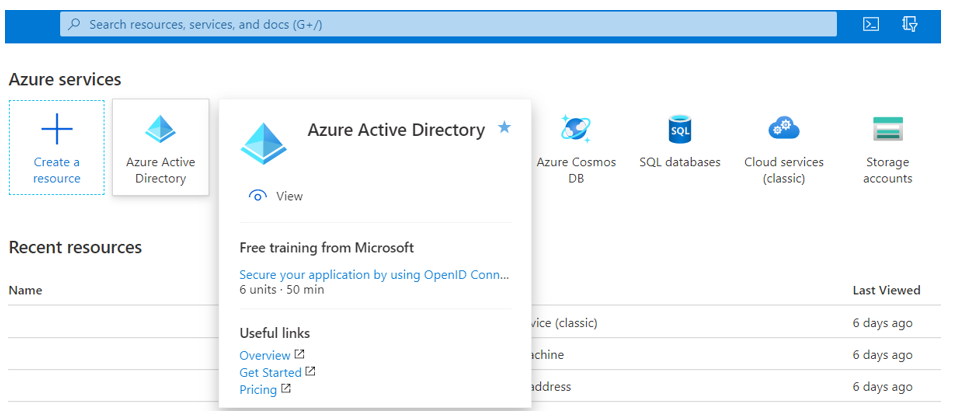
Microsoft Azure Portal
On the Microsoft Azure Portal, select “Azure Active Directory”:
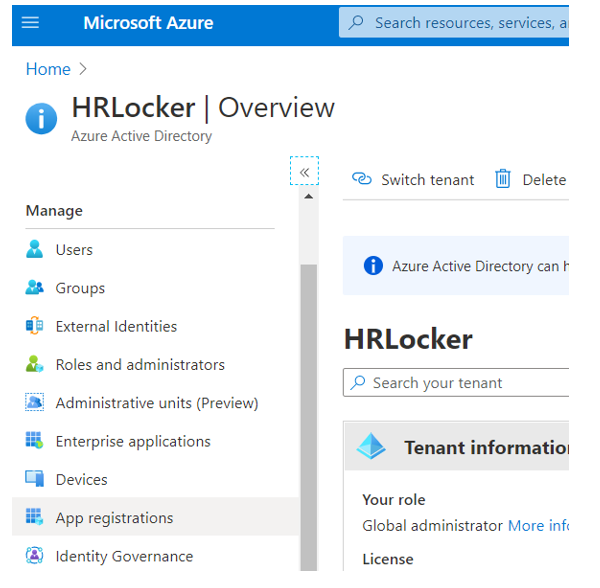
After Azure Active Directory opens, select “App registrations”:
Register new application
On the applications registrations page, select to “Add New registration”:
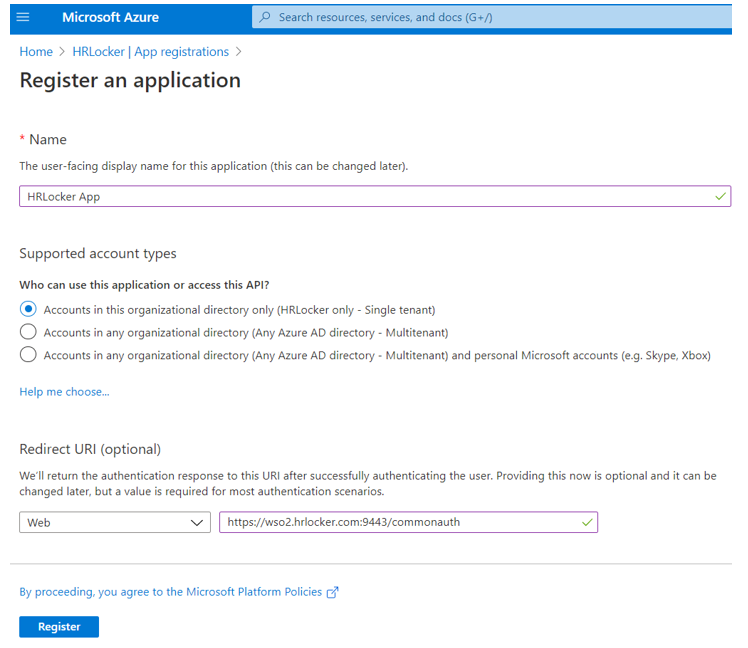
Give a new name for this Application (e.g: HRLocker App), leave “Accounts in this organizational directory only (HRLocker only - Single tenant)” as the Supported account type, let “Web” as the Redirect URI and add the following redirection URI: “https://identity.hrlocker.com/commonauth”:
(Optional step (required for SSO integration)
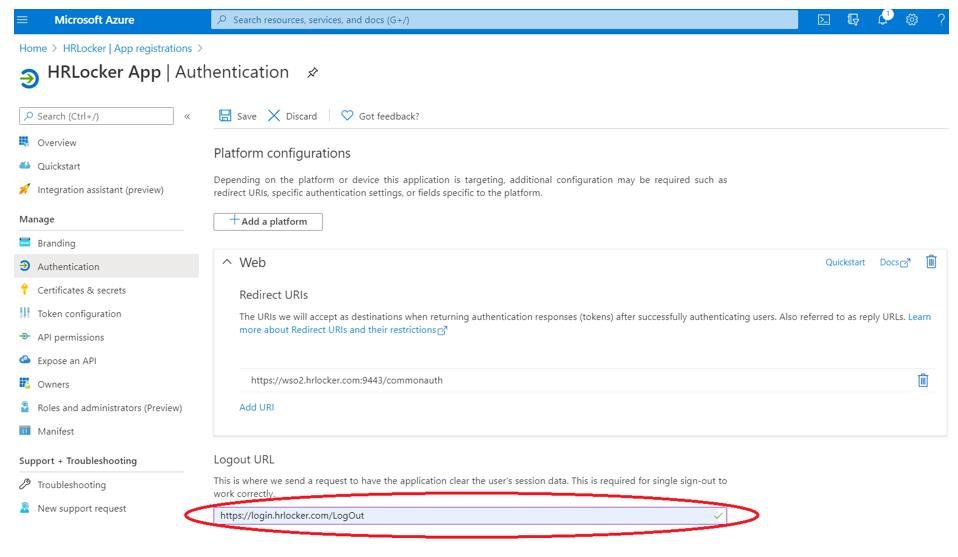
With the App registration created, go to Redirect URIs and click on the link as shown:

(Optional step (required for SSO integration)
Add the Logout URL for this app: https://login.hrlocker.com/LogOut
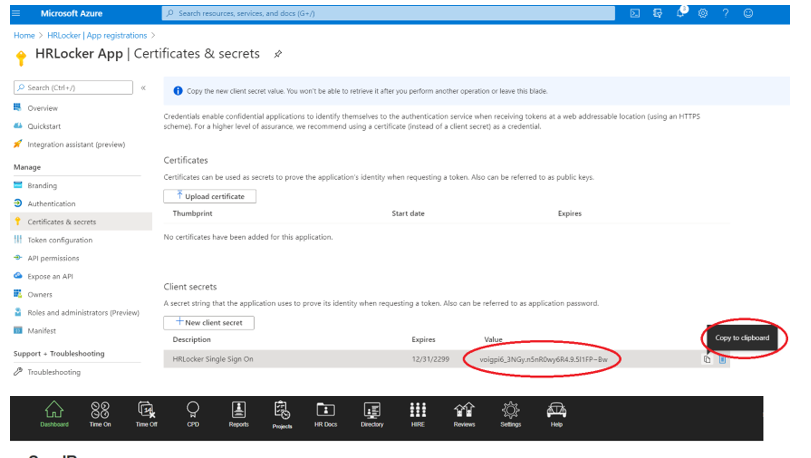
Save this information and select “Certificates & secrets”. After the page opens, select “Add New client secret” and type in the information:

Creating the Azure Active Directory Secret Value
Copy the newly generated Secret Value Azure created. That information needs to be added to the configuration screen in the Integrations tab in HRLocker
Granting permissions for Azure
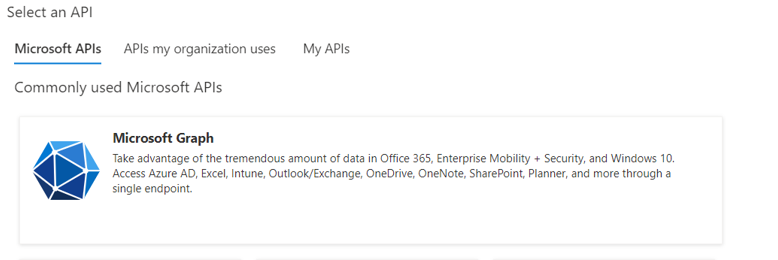
To be able to synchronise with HRLocker the application will need some permissions to authenticate the Azure AD users. In order to do that, click on “API permissions” and “Add a permission” as shown below:
Select “Microsoft Graph”:
With the list of permission types, select “Delegated permissions” as follows:
Select “Directory.Read.All” and “User.Read” as shown next:
And click on “Add permissions”.
With the list of permission types, select “Application permissions” as follows:
User.ReadWrite.All, Select UserNotification.ReadWrite.CreatedByApp

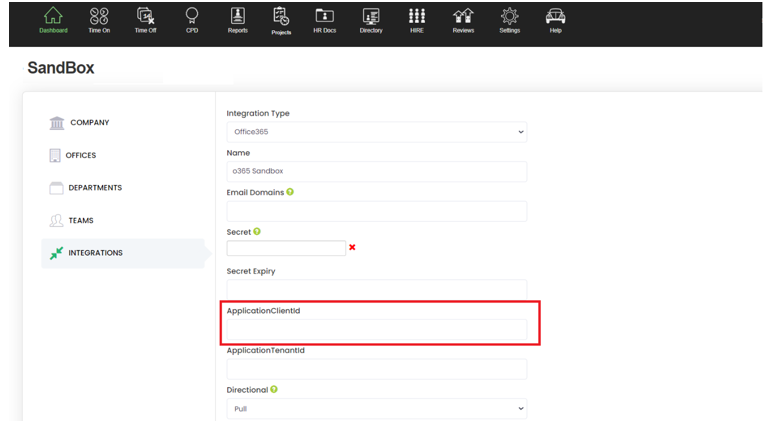
Lastly, go to the Overview page, copy the Tenant ID, Application (client) ID, along with the Secret Value and add them to the relevant fields in the Integrations tab

Submit the changes and allow a few seconds for the integration to validate the secrets and IDs with Azure
Questions and concerns
Please let us know if there are any questions regarding these settings and information.